

Diagnosing Engine Turbocharger Problems: Full Guide
Diagnosing engine turbocharger problems early saves costly repairs. Learn symptoms, step-by-step tests, and pro maintenance tips for heavy equipment
Loading article…
Article Not Found
The article you're looking for doesn't exist or may have been removed.
Back to BlogKey Takeaways
- Diagnosing engine turbocharger problems early prevents catastrophic engine damage and unplanned downtime.
- Common symptoms include excessive exhaust smoke, unusual noises, and measurable loss of power or boost pressure.
- According to technical study data cited by industry sources, approximately 50% of turbo failures trace back to lubrication issues.
- A systematic, step-by-step diagnostic approach outperforms guesswork and prevents unnecessary part replacements.
- Manufacturer-specific diagnostic tools from BorgWarner and Garrett Motion exist to guide technicians through failure analysis.
- Preventive maintenance, especially consistent oil changes with the correct specification, is the single most effective protection for any turbocharger.
Diagnosing Engine Turbocharger Problems: The Complete Field Guide
Diagnosing engine turbocharger problems is the process of systematically identifying the root cause of turbo-related failures before they escalate into full engine damage. Turbochargers fail due to lubrication breakdown, foreign object ingestion, overheating, and oil contamination.
How a Turbocharger Actually Works: The Mechanics Behind the Boost
A turbocharger is a forced induction device that uses exhaust gas energy to compress intake air, increasing the air density entering the combustion chamber. More dense air means more oxygen, which allows more fuel to burn per cycle, producing more power without increasing engine displacement. Understanding this mechanism is the foundation of effective turbocharger diagnosis.
What is a Turbocharger?
A turbocharger is a forced induction system that increases the engine's efficiency and power by forcing more air into the combustion chamber. This allows more fuel to be burned, resulting in increased horsepower without increasing engine size. As of 2026, turbocharged engines are standard across construction, mining, and energy equipment from Caterpillar, Komatsu, Volvo, and virtually every major OEM.
How Does a Turbocharger Work?
The turbocharger consists of a turbine housing and a compressor housing connected by a center bearing housing. Exhaust gases exit the engine and strike the turbine wheel, spinning it at extremely high rotational speeds. That spinning motion transfers directly through a shared shaft to the compressor wheel on the intake side. The compressor wheel draws in ambient air, accelerates it outward, and forces it through the charge air cooler (intercooler) and into the engine's intake manifold at above-atmospheric pressure.
The wastegate is the pressure-control valve in this system. When boost pressure reaches the target level set by the manufacturer, the wastegate opens and diverts exhaust gases around the turbine wheel, preventing overboosting. On variable geometry turbines (VGT), adjustable vanes replace the wastegate, giving the engine management system precise control over boost across the full RPM range. VGT systems are common on modern diesel engines in heavy equipment and are a frequent source of diagnostic complexity.
The center bearing housing is where most failures originate. The shaft connecting the two wheels spins on oil-fed journal bearings or ball bearings. Oil must arrive at the correct pressure and viscosity the moment the engine starts. Any interruption, contamination, or degradation of that oil film causes metal-to-metal contact at speeds that destroy bearing surfaces within seconds.
Common Turbocharger Components
- Turbine Wheel: Converts exhaust energy into mechanical rotation.
- Compressor Wheel: Compresses incoming air to increase charge density.
- Center Bearing Housing (CHRA): Houses the shaft, bearings, and oil passages. The most failure-prone assembly.
- Wastegate / VGT Vanes: Regulate boost pressure to stay within manufacturer specifications.
- Oil Supply and Drain Lines: Deliver pressurized lubrication to the bearings and return used oil to the sump.
- Charge Air Cooler (Intercooler): Cools compressed air before it enters the engine, increasing charge density further.
Common Symptoms of Turbocharger Problems
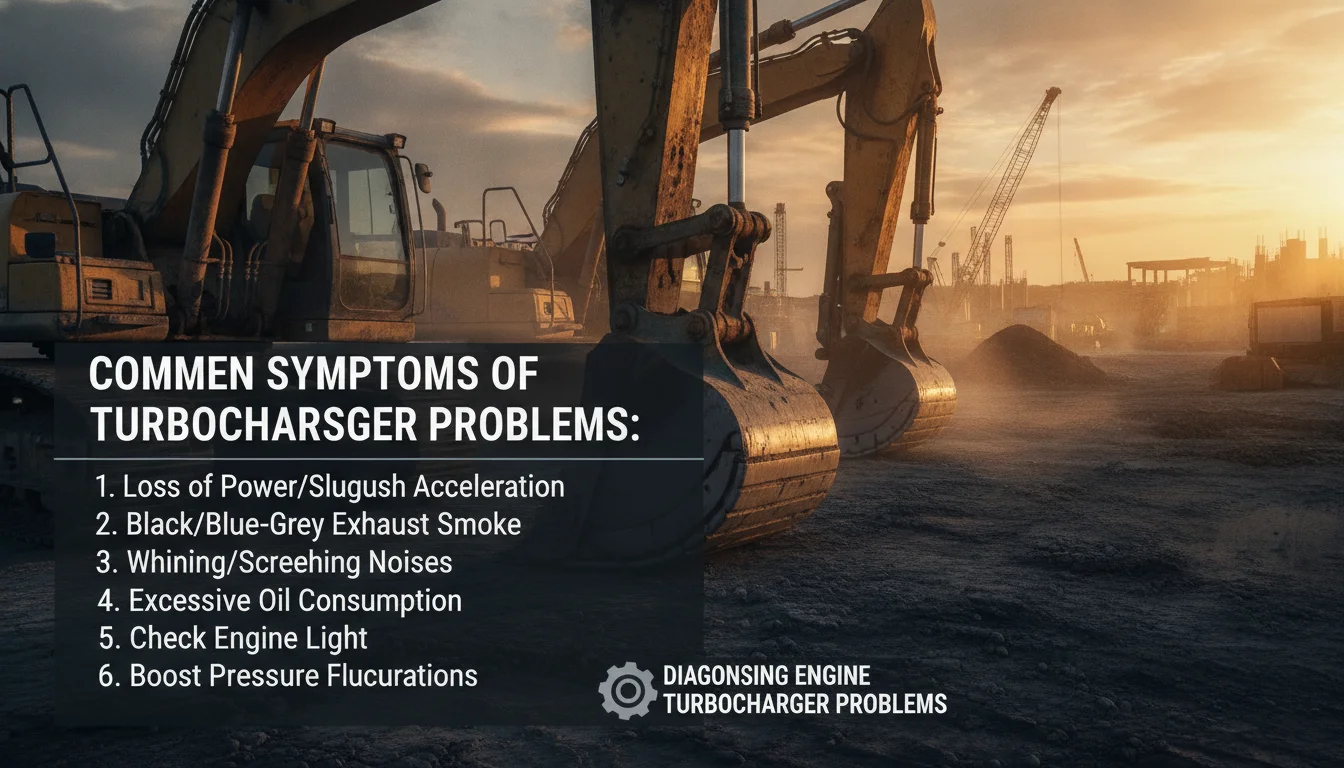
Identifying symptoms of turbocharger failure early can prevent extensive engine damage. According to manufacturer specifications and field data from Garrett Motion and BorgWarner, the most reliable early indicators are changes in exhaust color, audible changes in turbo noise, and measurable drops in boost pressure or engine response.
Excessive Smoke from the Exhaust
Excessive smoke is one of the clearest visual signals when diagnosing engine turbocharger problems. Blue smoke indicates oil burning inside the combustion chamber, typically caused by oil leaking past worn turbo shaft seals into the intake or exhaust stream. Black smoke points to an overly rich fuel mixture, often caused by insufficient boost pressure reaching the engine. White smoke can indicate coolant contamination, which, while less common in turbo-specific failures, warrants immediate investigation of the charge air cooler and head gasket.
Loss of Power
A noticeable decrease in engine power or acceleration is a direct symptom of reduced boost. This can stem from boost leaks in intercooler pipes, a stuck-open wastegate, damaged compressor blades, or a partially seized bearing assembly. On diesel-powered heavy equipment, operators often describe this as the machine "feeling heavy" or struggling on grades it previously handled without effort.
Unusual Noises
Whining or grinding noises from the engine bay are reliable auditory indicators. A high-pitched whine or siren-like sound typically signals air or exhaust gas leaking past a joint or damaged compressor blade. Grinding or rumbling noises point to bearing failure. Per BWD's turbocharger diagnosis guidance, whistling noises are most often caused by pre-turbine exhaust gas leaks or boost-side air leaks, and the first check should always be all pipe joints and connections.
High Oil Consumption Without Visible External Leaks
If an engine is consuming oil but no external puddles appear under the machine, the turbocharger is a primary suspect. Oil can be drawn through worn shaft seals into the intake side and burned in the combustion chamber, leaving no external trace. Check the inside of the intake pipe between the turbo compressor outlet and the intercooler for an oily film. Any oil deposit there confirms turbo seal leakage.
Poor Transient Response
Sluggish throttle response, particularly the delay between throttle input and power delivery, can indicate a partially blocked compressor, a dirty charge air cooler, or a VGT actuator that is not moving the vanes correctly. Per the Highway and Heavy Parts diagnostic checklist, restricted compressor intake ducts and blocked air ducts between the compressor and intake manifold are common causes of poor transient response that are often misattributed to fuel system problems.
Pros and Cons of DIY Turbocharger Diagnosis vs. Specialist Diagnosis

Pros
- DIY visual and boost pressure checks are fast, require minimal equipment, and can confirm or rule out the most common failure modes within an hour.
- OBD-II / engine management scanning is low-cost and provides specific fault codes that narrow the diagnostic field immediately.
- Early self-diagnosis prevents operators from running a failing turbo to destruction, which turns a repairable component into a full engine replacement job.
- Smoke testing for air leaks is a reliable, low-cost method that identifies boost leaks invisible to the naked eye.
Cons
- Internal bearing and wheel damage cannot be assessed without disassembly. Visual and pressure checks will not catch early-stage bearing wear before audible symptoms appear.
- VGT actuator diagnosis requires manufacturer-specific scan tools and live data parameters that generic OBD-II scanners do not provide.
- Misdiagnosis risk is high without systematic methodology. As Garrett Motion notes, turbo damage is frequently a symptom of an underlying engine problem, not the root cause. Replacing the turbo without fixing the root cause guarantees repeat failure.
- Oil analysis requires laboratory testing and cannot be performed in the field.
Step-by-Step Process for Diagnosing Engine Turbocharger Problems

Diagnosing engine turbocharger problems requires a systematic approach that moves from simple, no-cost checks to instrument-based testing. Follow these steps in sequence to avoid misdiagnosis and unnecessary part replacement.
Step 1: Document the Symptoms Before Touching Anything
Before opening the hood, record exactly what the operator observed: when symptoms started, under what load conditions, what the exhaust looked like, and whether any warning lights activated. This information shapes every subsequent diagnostic decision. A machine that loses power only under full load at high altitude points to a different failure mode than one that smokes at idle from a cold start.
Step 2: Visual Inspection
- Check for oil leaks around the turbocharger center housing, oil feed line, and oil drain line.
- Inspect all intake and charge air hoses for cracks, splits, or loose clamps.
- Examine the air filter and intake ducting for blockages, dirt accumulation, or signs of foreign object ingestion.
- Check the inside of the compressor inlet pipe for oil film, which indicates shaft seal failure.
- Inspect the exhaust manifold and turbine outlet for soot deposits or cracks.
- Check the wastegate linkage or VGT actuator rod for free movement and correct range of motion.
Step 3: Check for Diagnostic Trouble Codes (DTCs)
Connect an OBD-II scanner or the manufacturer's proprietary diagnostic tool and retrieve all stored and pending fault codes. Codes related to boost pressure (such as P0299 for underboost or P0234 for overboost) directly implicate the turbocharger system. However, codes related to MAF sensors, fuel trims, or EGR systems can also affect turbo performance and must be addressed before condemning the turbo itself.
Step 4: Perform a Boost Pressure Test
Use a calibrated boost gauge to measure the pressure the turbocharger generates under load. Compare readings to the manufacturer's specification for that engine at the tested RPM and load point. Low boost confirms a problem exists but does not identify whether the fault is the turbo, a boost leak, or a restricted exhaust. High boost points to a stuck-closed wastegate or VGT vane issue.
Step 5: Perform a Smoke Test for Boost Leaks
A smoke machine connected to the intake system (with the engine off) will pressurize the entire charge air circuit and reveal any leaks as visible smoke escaping from joints, cracked hoses, or intercooler end tanks. This test is fast and definitive. A boost leak large enough to cause a noticeable power loss is large enough to show clearly on a smoke test.
Step 6: Check Oil Supply and Drain Lines
Remove the oil feed line from the turbocharger and verify that oil flows freely when the engine is cranked. A restricted feed line starves the bearings. Check the oil drain line for kinks, carbon buildup, or blockage. A restricted drain line causes oil to back up in the center housing, overwhelming the shaft seals and pushing oil into both the intake and exhaust sides.
Step 7: Inspect the Compressor and Turbine Wheels
With the intake and exhaust pipes disconnected, use a flashlight to inspect the compressor and turbine blades for nicks, cracks, or blade tip contact with the housing. Any blade damage confirms foreign object ingestion. Check shaft radial and axial play by hand. Excessive radial movement indicates bearing wear. Some axial play is normal per manufacturer specifications, so compare findings against the OEM service bulletin for that specific unit.
Common Causes of Turbocharger Failure
Understanding the root causes of turbocharger failure is central to diagnosing engine turbocharger problems correctly. Garrett Motion categorizes turbo damage into four primary failure modes, all of which are supported by field evidence from heavy equipment applications.
Lack of Lubrication
Lubrication failure is the leading cause of turbocharger damage. According to technical study data cited by Goldfarb Inc., approximately 50% of turbo failures are attributed to lubrication issues, with a significant portion caused by delayed oil entry at startup and the remainder by insufficient oil flow during operation. The fix is not just an oil change. It requires verifying oil pressure at the turbo feed port, checking feed line condition, and confirming the correct oil specification is in use per the OEM service bulletin.
Foreign Object Damage
Small debris entering the compressor or turbine housing at high rotational speed causes immediate blade damage and imbalance. The imbalance then accelerates bearing wear. Per Garrett Motion's diagnostic guidance, this damage is visible as chipped or bent blade tips and is one of the few failure modes that is immediately obvious on visual inspection. The source of the foreign object must be identified and eliminated before fitting a replacement turbo.
Oil Contamination
Extended oil change intervals allow carbon particles to accumulate in the oil. Those particles circulate through the turbo bearing system, causing scored bearing surfaces and shaft damage. Following a major engine overhaul, steel particles from machining can remain in oil galleries and reach the turbo. This is why a full oil system flush and fresh oil fill is mandatory before starting any engine after internal repair work.
Overspeed and Excessive Temperature
Turbochargers are designed to operate within specific speed and temperature limits defined by the manufacturer. Unauthorized performance modifications, a malfunctioning fuel injection system delivering excess fuel, or a blocked exhaust system that raises back pressure can all push the turbo beyond its design parameters. The result is fatigue cracking of the compressor wheel back face, a condition Garrett Motion describes as showing an "orange peel" texture, and turbine wheel fatigue failure from cyclic overspeed.
Overheating from Restricted Airflow
A dirty air cleaner, restricted compressor intake duct, or blocked charge air cooler reduces airflow through the system. The turbo works harder to maintain boost, temperatures rise, and both the turbo and the engine suffer. Per the Highway and Heavy Parts diagnostic checklist, a restricted exhaust system has the same effect on the turbine side, raising exhaust back pressure and turbine inlet temperature simultaneously.
Tools and Techniques for Turbocharger Diagnostics
Effective diagnosing of engine turbocharger problems depends on having the right instruments. The following tools cover the full diagnostic spectrum from basic field checks to advanced electronic analysis.
Manufacturer Turbocharger Diagnostic Tools
Both BorgWarner and Garrett Motion have developed dedicated online turbocharger diagnostic tools. BorgWarner's Turbocharger Diagnostic Tool guides technicians through a symptom-based decision tree, identifying possible causes for each failure symptom and distinguishing between turbo-specific faults and upstream engine problems. Garrett Motion's diagnostic platform follows the same logic, emphasizing that the turbo should not be replaced until the root cause is confirmed. These tools are available through each manufacturer's aftermarket support portal and are the recommended starting point for any systematic diagnosis.
OBD-II and Proprietary Scan Tools
A quality OBD-II scanner retrieves boost-related fault codes and provides live data for intake manifold pressure, MAF readings, and fuel trim values. For heavy equipment with proprietary engine management systems (Caterpillar ET, Komatsu KOMTRAX, Volvo VCADS), the manufacturer's own diagnostic software is required to access turbo-specific parameters and actuator tests. Generic scanners will not reach these data points.
Boost Gauge and Pressure Gauges
A calibrated mechanical or digital boost gauge measures actual turbo output pressure under load. Oil pressure gauges verify that the turbo feed line is delivering oil at the correct pressure. Both instruments provide hard numbers that can be compared directly to OEM specifications.
Smoke Machine
A smoke machine is the most reliable tool for locating boost leaks in the charge air circuit. It pressurizes the system with visible smoke, making even small leaks immediately apparent. This tool eliminates guesswork from boost leak diagnosis and is standard equipment in any professional heavy equipment workshop.
Multimeter
A multimeter checks the electrical circuits controlling the VGT actuator, wastegate solenoid, and boost pressure sensor. Actuator wiring faults and sensor failures produce the same symptoms as mechanical turbo problems and must be ruled out before any mechanical work begins.
Comparison of Turbocharger Diagnostic Approaches
| Diagnostic Method | Best For | Advantages | Disadvantages | Equipment Required |
|---|---|---|---|---|
| Visual Inspection | First-pass field check | Fast, no equipment needed, identifies obvious leaks and damage | Cannot detect internal bearing wear or early-stage blade damage | Flashlight, basic hand tools |
| Boost Pressure Testing | Confirming boost output vs. spec | Provides measurable performance data directly comparable to OEM specs | Requires load testing; does not isolate the fault location | Calibrated boost gauge |
| Smoke Test (Boost Leak) | Locating charge air leaks | Definitive, fast, reveals leaks invisible to visual inspection | Requires smoke machine; engine must be off | Smoke machine, adapters |
| Diagnostic Trouble Codes (DTCs) | Electronic fault identification | Pinpoints specific system faults; guides further testing | Dependent on sensor function; won't catch mechanical wear without sensor input | OBD-II or proprietary scan tool |
| Manufacturer Diagnostic Tool | Complete systematic diagnosis | Symptom-based decision tree; distinguishes turbo faults from engine faults | Requires internet access or software license | BorgWarner or Garrett Motion portal access |
| Physical Wheel and Shaft Inspection | Confirming internal damage | Directly reveals blade damage, bearing wear, and shaft play | Requires pipe removal; time-consuming on installed units | Flashlight, feeler gauges, OEM spec sheet |
Common Mistakes When Diagnosing Engine Turbocharger Problems
Diagnosing engine turbocharger problems incorrectly is expensive. These are the most frequent errors we see in the field, and each one can turn a straightforward repair into a repeat failure.
Replacing the Turbo Without Finding the Root Cause
This is the single most costly mistake in turbocharger repair. As Garrett Motion states directly in their diagnostic guidance: turbo damage is often a symptom of an underlying problem, not the cause itself. A new turbo installed into an engine with a blocked oil drain line, contaminated oil, or a leaking crankcase ventilation system will fail again, often within hours of startup. Always confirm and fix the root cause before fitting any replacement unit.
Ignoring the Oil Drain Line
Most technicians check the oil feed line but overlook the drain. A partially blocked drain line causes oil to pool in the center housing, raising the pressure against the shaft seals and forcing oil into both the intake and exhaust. The symptom looks identical to a failed shaft seal, and the turbo is condemned when the real fix is a $30 drain line replacement.
Using the Wrong Oil Specification
Turbocharger bearings are precision components with extremely tight clearances. Using an oil with the wrong viscosity or additive package, even temporarily, can cause accelerated wear. Always verify the oil specification against the engine manufacturer's service bulletin, not just the oil cap label. This is especially relevant for equipment operating in extreme temperature environments.
Skipping the Air Filter Check
A severely restricted air filter reduces airflow to the compressor, causes the turbo to work beyond its design point, and raises intake temperatures. It also creates a partial vacuum in the intake that can pull oil past the compressor seal. Many turbo failures that appear to be seal failures are actually downstream effects of a neglected air filter.
Assuming All Boost Leaks Are at the Turbo
Boost leaks can occur anywhere in the charge air circuit: intercooler end tanks, hose clamps, intake manifold gaskets, and EGR connections. A smoke test is the only reliable way to locate the actual leak point. Replacing the turbo when the leak is in a $15 hose clamp is an expensive and avoidable error.
Real-World Scenario: Diagnosing a Komatsu PC360 Excavator Turbo Fault
Consider a realistic scenario that reflects the diagnostic process in practice. A Komatsu PC360 excavator arrives at a workshop with the operator reporting gradual power loss over two weeks, blue smoke at startup that clears after a few minutes, and a slight increase in oil consumption. No warning lights have activated.
Step 1 (Documentation): The technician notes that symptoms are worst at cold start and improve as the engine warms. This pattern points toward oil pooling in the turbo center housing overnight and burning off at startup, rather than a catastrophic seal failure.
Step 2 (Visual): The inside of the compressor outlet pipe shows a light oil film. The oil drain line has a visible kink where it routes around the engine block. The air filter is within service limits.
Step 3 (DTC scan): No boost-related fault codes are stored. The engine management system shows no active faults.
Step 4 (Boost test): Boost pressure under load is within the lower end of the manufacturer's specification range, confirming the turbo is still producing boost but the system is not optimal.
Diagnosis: The kinked oil drain line is restricting oil return from the turbo center housing. Oil backs up, overwhelms the compressor-side shaft seal, and is drawn into the intake. The turbo itself is not failed. The fix is drain line replacement, a full oil change with the correct Komatsu-specified oil, and a short idle period before shutdown for the next several operating cycles to allow the turbo to cool with oil flowing.
Outcome: The drain line is replaced for a fraction of the cost of a turbo replacement. Blue smoke clears within two days of normal operation. The turbo continues in service. This scenario illustrates exactly why systematic diagnosis matters: the symptom pointed to the turbo, but the root cause was a kinked drain line.
"A defective turbocharger is often the consequence of some other primary engine defect which cannot be cured just by replacing the turbocharger. Determine the true nature and extent of the trouble before ordering parts." - BorgWarner Aftermarket Turbocharger Troubleshooting Guidance
"Turbo damage can often be a symptom of an underlying problem rather than the cause itself. Complete a diagnostic check before you replace your turbo." - Garrett Motion Turbocharger System Diagnostics Guide
Turbocharger Repair Cost: What to Expect in 2026
Diagnosing engine turbocharger problems accurately has a direct impact on repair cost. The range between a minor fix and a full turbo replacement is significant, and the difference almost always comes down to how thoroughly the root cause was identified.
Minor repairs, such as replacing a kinked oil drain line, a cracked boost hose, or a faulty wastegate solenoid, are low-cost interventions that restore full performance when the turbo itself is undamaged. A full turbocharger replacement on heavy equipment, by contrast, involves the cost of the unit itself plus labor for removal, installation, and system flushing. For OEM-specification replacement turbos on Caterpillar, Komatsu, or Volvo equipment, the unit cost varies by model and application.
The most expensive outcome is replacing a turbo without fixing the root cause, then replacing it again after the second unit fails. This scenario, which is common when diagnosis is skipped, effectively doubles the repair cost and adds significant downtime. Thorough diagnosis before ordering any parts is always the more cost-effective path.
As of 2026, OEM-quality replacement turbochargers and turbo component kits for major equipment brands are available through global spare parts suppliers with significantly shorter lead times than waiting on regional dealer stock. For procurement managers sourcing replacement turbos for fleet equipment, verifying OEM compatibility and confirming the correct part number against the engine serial number is the critical first step before any purchase.
Preventive Maintenance for Turbochargers
Preventing turbocharger problems is more cost-effective than diagnosing and repairing them after failure. The following practices, applied consistently, extend turbo service life significantly.
Regular Oil Changes with the Correct Specification
Changing engine oil at the intervals specified by the equipment manufacturer, using the exact oil grade and specification listed in the service bulletin, is the most important single action for turbocharger longevity. Oil that is overdue for a change carries carbon particles and degraded additives that score bearing surfaces. Never substitute a different viscosity grade without confirming compatibility with the OEM specification.
Allow Proper Warm-Up and Cool-Down
Turbochargers reach operating temperature faster than the engine block. At cold start, oil pressure must reach the turbo bearings before the shaft begins spinning at high speed. Avoid high-load operation in the first minutes after a cold start. Equally important: after hard work, allow the engine to idle for several minutes before shutdown. This lets oil continue circulating through the center housing while the turbine cools, preventing oil coking on the bearing surfaces.
Inspect and Service the Air Filtration System
Replace air filters at the manufacturer's recommended intervals, or sooner in dusty environments such as quarries, open-cut mines, and demolition sites. A restricted filter is a direct path to compressor seal failure and foreign object ingestion if the filter media collapses.
Use Quality Fuel
Using high-quality fuel reduces carbon buildup in the combustion chamber and exhaust system, which indirectly benefits the turbocharger by keeping exhaust temperatures and back pressure within normal operating ranges.
Monitor Engine Temperature and Oil Pressure
Keep a consistent eye on engine temperature and oil pressure gauges during operation. Elevated coolant temperature and low oil pressure are the two pre-failure indicators most likely to precede a turbocharger failure. Address either condition immediately rather than completing the shift.
Pro Tip: Post-Overhaul Oil System Flush
Pro Tip: After any major engine internal repair, perform a full oil system flush and fill with fresh oil before starting the engine. Metal particles from machining operations remain in oil galleries and will reach the turbo bearing system within minutes of first startup. This single step prevents a significant proportion of post-overhaul turbo failures.
Frequently Asked Questions
How can I diagnose a bad turbocharger?
Diagnosing engine turbocharger problems starts with documenting symptoms: excessive exhaust smoke, loss of power, unusual noises, or high oil consumption. Follow a systematic process: visual inspection first, then DTC scanning, boost pressure testing, and a smoke test for boost leaks. Per Garrett Motion's diagnostic guidance, always confirm the root cause before replacing the turbo, since turbo damage is frequently a symptom of an upstream engine problem rather than the primary fault.
Is it expensive to fix a turbo?
Repair cost depends entirely on what is actually wrong. A kinked drain line or cracked boost hose is a low-cost fix. A full turbocharger replacement on heavy equipment is a more significant investment, and the cost doubles if the root cause is not fixed and the replacement unit fails again. Thorough diagnosis before ordering parts is always the more economical approach.
What are the first signs of turbo failure?
The earliest signs are typically a gradual reduction in power or throttle response, blue smoke at cold startup that clears as the engine warms, and a slight increase in oil consumption without visible external leaks. A high-pitched whine or siren-like noise from the engine bay is also an early indicator, particularly if it changes pitch with engine load.
Will a bad turbo throw a code?
Yes, a failing turbocharger can trigger diagnostic trouble codes related to boost pressure, such as P0299 (underboost) or P0234 (overboost). However, not all turbo problems generate codes immediately. Mechanical failures like bearing wear or blade damage may not trigger a code until the fault is severe enough to affect a monitored sensor parameter. DTC scanning is a useful starting point but should not be the only diagnostic step.
How often should I service my turbocharger?
Turbochargers do not have a separate service interval from the engine oil system. Service the turbocharger by following the engine manufacturer's oil change schedule precisely, inspecting the oil feed and drain lines at each service, and checking the air filtration system condition. In high-dust environments, shorten air filter inspection intervals accordingly.
What happens when a turbo fails while driving?
If a turbo fails during operation, the immediate result is a loss of boost and a significant reduction in power. In severe cases, oil can enter the intake system in large quantities, causing the engine to run on its own oil, which can lead to engine overspeed and catastrophic internal damage. If a turbo failure is suspected during operation, reduce load immediately, allow the engine to idle briefly, and shut down for inspection. Do not continue operating under load with a suspected turbo failure.
Can I drive or operate equipment with a failing turbocharger?
Continued operation with a known or suspected turbo fault is not advisable. A turbo that is leaking oil into the intake can cause engine damage well beyond the turbo itself. A turbo with bearing failure can shed metal debris into the engine oil system, contaminating the entire lubrication circuit. The cost of operating through a turbo fault is almost always higher than the cost of stopping for diagnosis and repair.
Source Your Replacement Turbocharger Components Through 3GEN Export
Once diagnosing engine turbocharger problems has confirmed what needs replacing, sourcing the correct OEM-quality component quickly is the next priority. At 3GEN Export, we supply turbocharger assemblies, center housing rotating assemblies (CHRAs), oil feed and drain line kits, and related components for Caterpillar, Komatsu, Volvo, Atlas Copco, and 40+ additional equipment brands. Every part ships to OEM specifications, verified against engine serial number and model data before dispatch.
We serve procurement managers and fleet maintenance teams across construction, mining, and energy sectors globally. Our standard delivery window is 5 business days to most international destinations, with expedited options available for critical downtime situations. Visit our parts categories to find turbocharger components by brand and application, or contact our technical team directly with your engine model and serial number for a confirmed compatibility check.
For further reading on related heavy equipment maintenance topics, see our guides on engine maintenance best practices and hydraulic system diagnostics available on the 3GEN Export blog.